Testing Symfony 5 applications
- Details
- Category: Programming internals
Article Index
There are a lot of good articles on test driven development in php and some on doing this in Symfony. I use this a lot in my projects, including continuous integration via a Jenkins CI server. In this article, I will explain a few special things that I use in my tests, which might or might not be of help for others.
Introduction
Developing Symfony 5 applications is like developing any other software: it can be done by just coding some functions or one can try to use a bunch of automatic tools to improve quality and to be faster to deploy. In the following article, I will show how I use tools and automatic testing to improve quality and to speed up releases.
Unittests: theory and reality
Doing unit tests by the book would mean to test a class stand-alone, without any other classes, i.e. by mocking all other needed classes. The theory behind this is, that a failing unit test points exactly to the one place in the unit where the behaviour has changed, and you can fix the problem really quickly. In reality, this will usually cause several tests including integration tests to fail, and it might even mean that only some integration tests fail because the unit test does not cover the case in which the cooperation between two classes fails.
I do not write unit tests by mocking all dependencies, because this generates a lot of extra work without any real benefit. That is why I for example use the real database in unit tests. I only use mock objects when I need to change the behaviour of an external class to generate a special state in my test class, e.g. to generate some kind of special error state.
Working with the database
Integration and functional tests usually use a database, and I also do this in the unit tests. In production, this is often a mysql or mariadb system, which can be used for these kind of tests as well. While this works fine, it has some drawbacks:
- Each test should be independent of the other tests. For this, the database should be identical for each test, which requires a database reset and reload of all fixture data before each test case. This can really slow down the tests.
- Because all tests use the same database, they must be run one after the other. It is not possible do do multiple tests at the same time.
To work around this, we can use sqlite instead of mysql. While sqlite also is a database with an sql interface, it is stored in a single file. This makes the handling of the tests a lot easier and, if used correctly, also a lot faster.
For tests, I use the Liip test fixtures bundle in combination with an sqlite database. In this way, each single test starts with a clean, fresh database. The fixture bundle ensures, that the sqlite file is cached, so this is done much faster than cleaning and initialising the database for each test case. To give you an example: I run 415 tests cases with 4700+ assertions in about 4 minutes on an i7. Until now, I have not tried to run the tests in parallel on multiple CPU cores to speed things up. In theory though, this should be quite easy in the current setup. We just have to make sure that each tests uses its own sqlite database file.
Problems with case sensitivity
Usually in mysql we use a case insensitive scheme (e.g. utf8_general_ci, _ci as in case insensitive). sqlite on the other hand IS case sensitive. This can lead to problems in testing. To make sure the tests work with either database setting, use the case sensitive tests and fixture data.
Workaround for the foreign key check problem
By default, in sqlite the foreign key checks are disabled, and so are they in doctrine when using sqlite. So when we use sqlite in tests, we could miss some errors which could pop up in production. More importantly, some triggers like cascading deletes or onDelete="SET NULL" do not work when foreign key checks are disabled, since they are part of the foreign key definition. To get this working, the foreign key checks must be enabled before working with the entity manager. One way to do this is by an event subscriber, as proposed by Tom Newby. This has the advantage, that it also works when using sqlite in the production environment. In my case, I only use sqlite in tests, which makes it a bit easier, by enabling foreign key checks only in our tests. I do this in the setUp method both in the TestCase and WebTestCase, using this method:
/**
 * By default, the foreign key checks are disabled when using sqlite and Doctrine. This prevents cascading
 * deletes, which are managed by the foreign keys. To be able to use the these, the foreign key checks must be
 * enabled manually. This method can enable or disable these checks
 *
 * @param bool $enable
 */
private function useForeignKeys(bool $enable): void
{
    if ($enable) {
        $setting = 'ON';
    } else {
        $setting = 'OFF';
    }
    $this->getEntityManager()
         ->createNativeQuery("PRAGMA foreign_keys = $setting;", new ResultSetMapping())
         ->execute();
}
There is one case to which needs some special attention: loading fixtures fails. There seems to be a not so clean implementation for sqlite in doctrine or in the Liip fixtures bundle, which generates foreign key constraint errors on loading the fixtures. I could not figure out exactly why this fails. To make this work, we have to disable the foreign key support on loading the fixtures, which is done here.
Use special test classes
Usually unit tests are derived from PHPUnit\Framework\TestCase, controller tests from Symfony\Bundle\FrameworkBundle\Test\WebTestCase. But to add some functionality, I created these two classes of my own. Both are derived from Liip\FunctionalTestBundle\Test\WebTestCase. I have added several functions to simplify testing:
| Method | TestCase | WebTestCase | Description |
|---|---|---|---|
| checkContainerRegistration | x | Check if a service class is registered correctly in the service container. | |
| checkLinkOnDashboardPage | x | Check if a certain link is found on the the general or on the administration dashboard page. | |
| clearAllLogFiles | x | x | Clear the logfile entry database table. This is used when the test has to check if the correct log entries are generated. This is easier when clearing the log table before the new log entries are generated. |
| getAllLogs | x | x | Read all logfile entries from the database. |
| getEntityManager | x | x | Return the current entity manager. |
| getFixtureReference | x | x | Return a database entity by calling its string name from the fixture reference string. |
| getMyClient | x | Return the client, in the passed user is logged in. When calling this with a different user, this new user is logged in. | |
| getTranslator | x | x | Return the current translator service. |
| loadAllFixtures | x | x | Load all fixtures for the passed group. This is the same as calling ./bin/console doctrine:fixtures:load --group=<the passed group>. Passing no group the method will load the default group fixtures. Passing a non-existing group will not load any fixtures, i.e. removing all data from the database. |
| onNotSuccessfulTest | x | x | This is called when a test fails. It writes the output of the test to a file under var/tests. When the test is a web test case, the complete html output is written to this file, so it can be opened with a web browser to see what the page looked like at the time of the failure. |
| setGuiLanguage | x | Change to current locale, so the next page request is in the defined language. | |
| setLoggedInUserForLogging | x | x | Define the user under which all logs are generated during the next test. |
You can have a look at the source code of this here: TestCase, WebTestCase and TestCaseTrait (for common functions used by both of them)
By defining the method onNotSuccessfulTest, I can debug what went wrong when a test fails. On failure, it creates an html file under var/test, which is called like the test class and the test case, e.g. App_Tests_Controller_Member_MemberContactDataControllerTest___testShowEdit.html. For unit tests (using TestCase), this file only contains the stack dump for the test. For integration tests, which use WebTestCase, this dumps the last html seen by the test before it failed. With that, you can open this file in the browser and see the page like the test saw it before it failed. This makes it a lot easier analysing the cause of the failure: is the test or the app broken?
Injecting a mock into the service container
When doing system testing, sometime you need to change one of the services used by a controler class. Usually you want to use all the services when calling a page in your project. But sometimes it is necessary to change the behavior of a service, e.g. when an error situation should be tested, like a service which throws an exception. Doing this is quite easy:
- Mock the service whose behaviour you want to change.
- Define the behaviour, e.g throw an exception when a certain method is called.
- Inject the mocked service into the service container which will be used by the controller class when being called by the test browser, i.e. the crawler.
While steps 1 and 2 are straight-forward, step 3 can be a real pain. There are two ways to overwrite an existing service in the container. Because of the way the service container is build in Symfony, this is only possible for public services. So in the services.yaml, you need to define the service to be mocked like this:
services:
    ...

    App\Service\GenerateExcelDataFile:
        public: true
Using the test container
In Symfony 3 most services were made private, which made it impossible to overwrite them with mocks in tests. Since Symfony 4.1 there is a special container for tests. How to use this, is described in https://symfony.com/blog/new-in-symfony-4-1-simpler-service-testing:
<?php

namespace App\Tests;

use Symfony\Bundle\FrameworkBundle\Test\WebTestCase;

class MyClassTest extends WebTestCase
{
    public function testIndex()
    {
        $client = static::createClient();

        $serviceMock = $this->createMock(MyService::class);
        $serviceMock->method('doSomeThing')
                      ->will($this->throwException((new \Exception('Testexception'))));

        self::$container->set(MyService::class, $serviceMock);
        $crawler = $client->request('GET', '/index');
        $this->assertStringContainsString('Textexception', $crawler->html());
    }
}
In line 17, the service which is used by the controller is injected into the container. When calling the controller in line 18, it uses the mock service, which throws an exception.
Using the container from the client
In system tests in Symfony, you create a client object, which is uses to browse the pages. You can get the container object and inject the mock into this object. Here is a small example:
<?php

namespace App\Tests;

use Symfony\Bundle\FrameworkBundle\Test\WebTestCase;

class MyClassTest extends WebTestCase
{
    public function testIndex()
    {
        $client = static::createClient();

        $serviceMock = $this->createMock(MyService::class);
        $serviceMock->method('doSomeThing')
                      ->will($this->throwException((new \Exception('Testexception'))));

        $client->getContainer()->set(MyService::class, $serviceMock);
        $crawler = $client->request('GET', '/index');
        $this->assertStringContainsString('Textexception', $crawler->html());
    }
}
In line 17, the service which is used by the controller is injected into the container. When calling the controller in line 18, it uses the mock service, which throws an exception.
Test automation
Having tools like automatic tests and code checks is great. But it is even better, when these are used automatically. Because of that, I use a Jenkins continuous integration server to automatically run whenever I check in a new version of the source code. I have even two Jenkins servers running: one on my laptop and one on my server. The first one helps me even when I am not at home, the latter one runs all the time and is the "final instance" to judge if the software also runs on a different system, which maybe has a different php and tool versions. Here is picture of one of the jenkins instances:
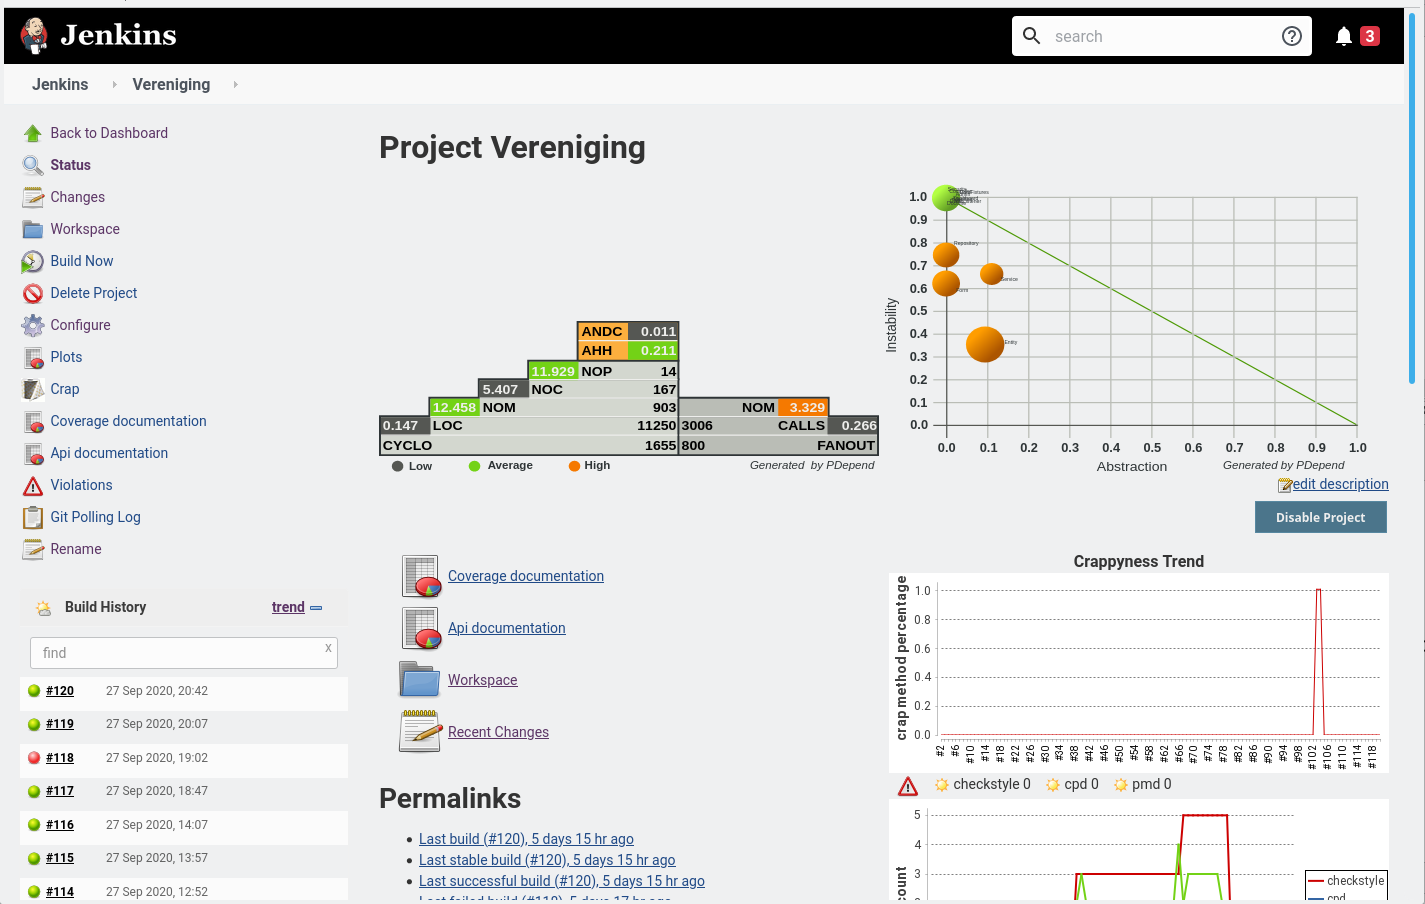
This is based on a template made by Sebastian Bergmann, the man behind some of the quality tools in php like phpunit. On the website for this, he explains how to setup jenkins and the project to be used by php projects. Using jenkins to automate the quality checks is done in a 2-step-process:
- Create all the information files on the project by running tools like phpunit, php mess detector, style checks, etc.
- Visualise this information on the jenkins server.
Automating all build steps
I use the build system ant, which is a project maintained by the Apache community (most know by the Apache HTTP/web server). In this system, you create a file called build.xml, in which all build steps are defined. By calling ant you can run one or more of these steps automatically. My build.xml is located in the root directory of the project. I defined two different build runs, one running all the tools except the coverage run of phpunit (build-fast), and one including this (build-coverage). Background was that the coverage run took more than an hour, while the normal run took 30 minutes (on my quite slow Intel Pentium Silver J5005 CPU). Since upgrading to php 7.4, phpunit 9.3 and symfony 5, these runs only take 7 and 8 minutes. I will probably remove the coverage run in the future.
Here are the steps done in my build:
| Tool / target name | build-fast | build-coverage | Purpose |
|---|---|---|---|
| install-tools | x | x | This installs the current version of all needed tools. I moved from using composer to phive to install tools recently, because managing the dependencies in composer for the tools was a real pain. In phive, the tools are managed independently of the versions of the projects libraries, which makes sense. With phive I can manage all but one tool: php code browser unfortunately is not yet downloadable by phive. Here I download it directly from the internet page. |
| prepare | x |
|
|
| prepare-coverage | x |
|
|
| db-init | x | x |
|
| lint | x | x | Check the php code for any syntax errors. |
| pdepend | x | x | Create a lot of metrics on the source code. |
| phpmd | x | x | PHP mess detector is a static code analysis, which checks for typical programming errors and code smells like code which is too complex (cyclomatic complexity). |
| phpcpd | x | x | PHP copy/paste detector checks if identical pieces of code are found in different parts of the software. Copy and pasting pieces of code instead of creating methods / services for that is a code smell, because it reduces the maintainability of the code. |
| phpcs | x | x | PHP code sniffer checks if the code style complies to the defined code style (symfony2 in my project). |
| phploc | x | x | This measures the size and structure of the project, e.g. it shows how many lines of code the project has. |
| phpcb | x | x | PHP code browser generates an html structure for the source code. |
| phpdoc | x | x | Generate the doxygen documentation for the entire project. |
| phpunit | x | Run the unit and integration tests without generating coverage information. | |
| phpunit-coverage | x | Run the unit and integration tests including the generation of coverage information. |
The nice thing about ant is that all these targets can be run in one step, e.g. ant build-fast. But it is also possible to run one of the steps by its own or a block of steps, e.g. ant db-init to do all steps to initialise the database.
Visualising the results
This page describes which jenkins plugins have to be installed to visualise the results of the build. In Jenkins, there are a lot of so call post-build actions, which run the plugins to visualise the result. By using the template made by Sebastian Bergmann, this is quite easy. By now, there are several plugins marked as depricated. I haven't found the time yet to check if these already have been updated in the template.
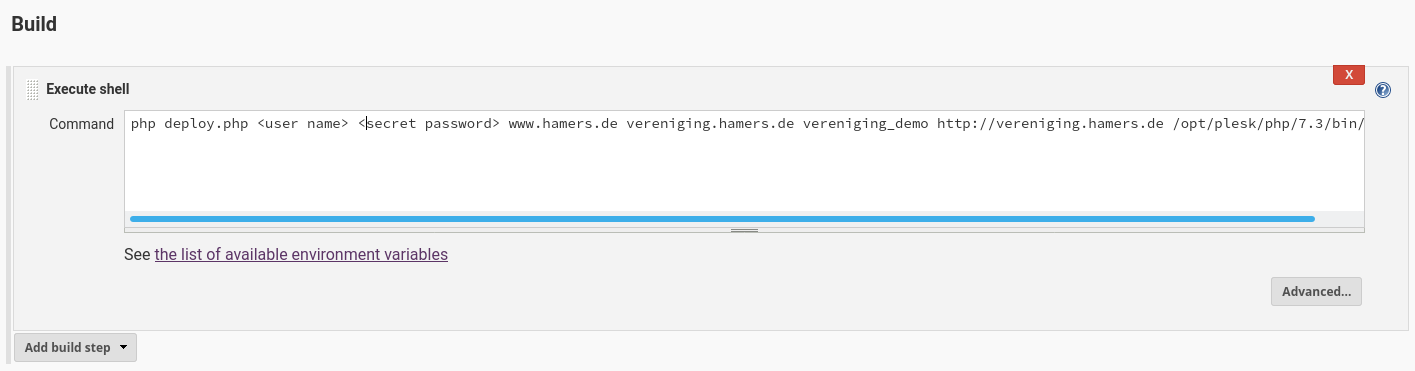
Deployment
I run two production instances of this project: the one on this page and one for the Dutch-German Society. To update these, I created two jenkins jobs to do the deployment. They use the deployment script, which automates all the steps needed for deploying to a web space without ssh-access and git command line tool. Now I can just press a button at any time and the software including the database are updated on these two production servers.